Showing posts with label cute. Show all posts

Sunday, February 28, 2010

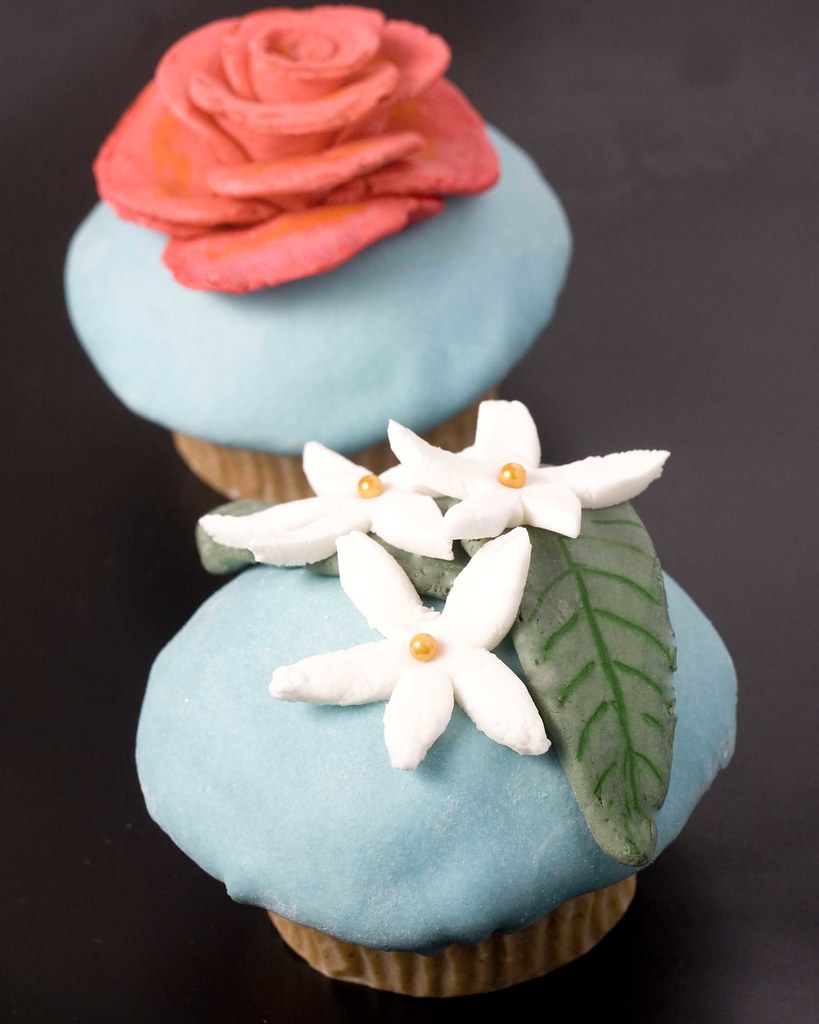
Orange Blossom and Rosewater Cupcakes


Having spent so much of the last few weeks in front of a computer, I am just itching to get back to the kitchen.  What odd is, where I formerly would focus mainly on cooking, I recently have had a pull towards baking.  I think I have this blog to thank for that.  My sweet tooth is a little under-active,  so I've never really had too much cause to bake before (unless it's savory).  Being able to share baking on Peas Love Carrots changes everything, however.  I always had an interest in cake decorating, and now I'm free to play with it!


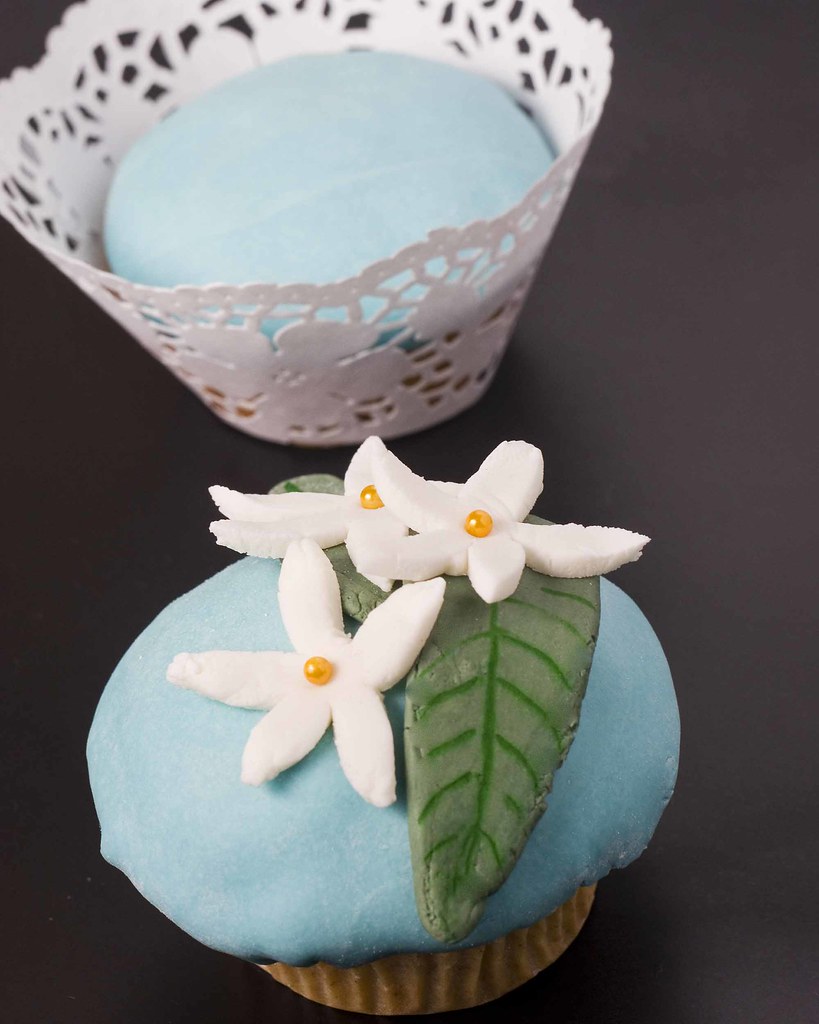
I've been wanting to do something with flower waters, where you know what flavors you have by the type of flower on the top.  I modeled the flowers after the beautiful carvings I've seen all around Mexico, so often featuring the vibrant blues and folks-y shapes. I love them!


Finding myself with an actual free day yesterday, I decided to dive right in... and make fondant!  Fondant is really one of the coolest, most versatile cake "frosting" out there, but it's usually not terribly tasty.  Pre-made brands, like Wilton, give you convenience, but it tastes a little... off.  Marshmallow fondant is easy to make, and tastes pretty good, too.
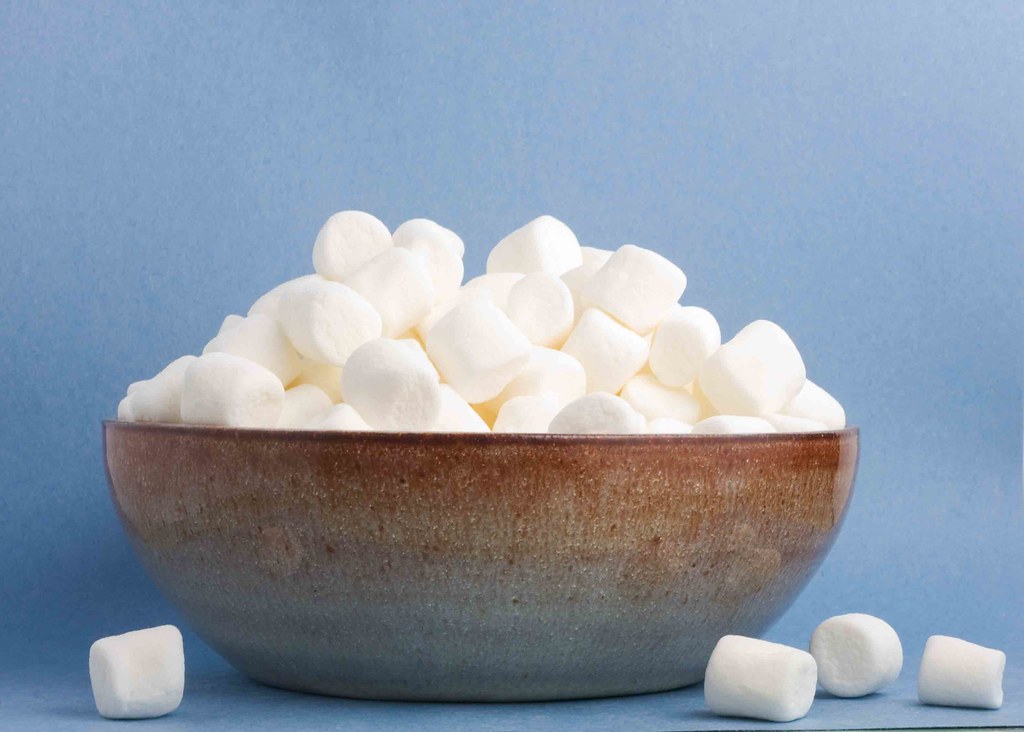

For a large batch (you can refrigerate unused portions for months) you'll need...

1 16 ounce bag on mini marshmallows
2-4 tablespoons of water
2 pounds (one standard bag) of powdered sugar
Vegetable shortening to coat hands and finished fondant
Cornstarch for rolling

Place marshmallows in largest bowl that fits in your microwave and toss along with 2 tablespoons water.  Microwave on high for 30 seconds, remove and stir.  Repeat until marshmallows are completely melted and almost soupy (about 2.5 minutes).

With a wooden spoon (it's very hot, don't touch it with bare hands yet), begin folding in powdered sugar at about 1 cup at a time.  You may not use all the of sugar.  You can add a flavor oil now if you like, such as orange or almond.  Use the spoon as much as possible to incorporate the mixture, then grease hand liberally with shortening.  Test to make sure the mixture is cool enough to handle, then begin kneading.  I suggest doing this right in the bowl, but you can also turn the dough out onto a surface, just grease it first!  Knead until smooth and pulls into elastic ribbons (about 8 minutes).  If it tears easily, it's too dry.  Add a teaspoon of water at a time, kneading in between, until desired elasticity is achieved.

Divide out the portion of fondant you need, and coat the remain amount with a thin layer of shortening.  Double-wrap in plastic and keep in a zip top bag with as little air in it as possible.  It can be stored in the refrigerator for several months.  If it becomes to dry, microwave for 5 - 10 seconds.  Be careful, it may be hot after this.

Doesn't it sort of look like a little baby bird waiting to be fed?  Didn't notice it until the picture...

To roll fondant: Sprinkle a small amount of cornstarch as you would flour and roll out to desired thinness.
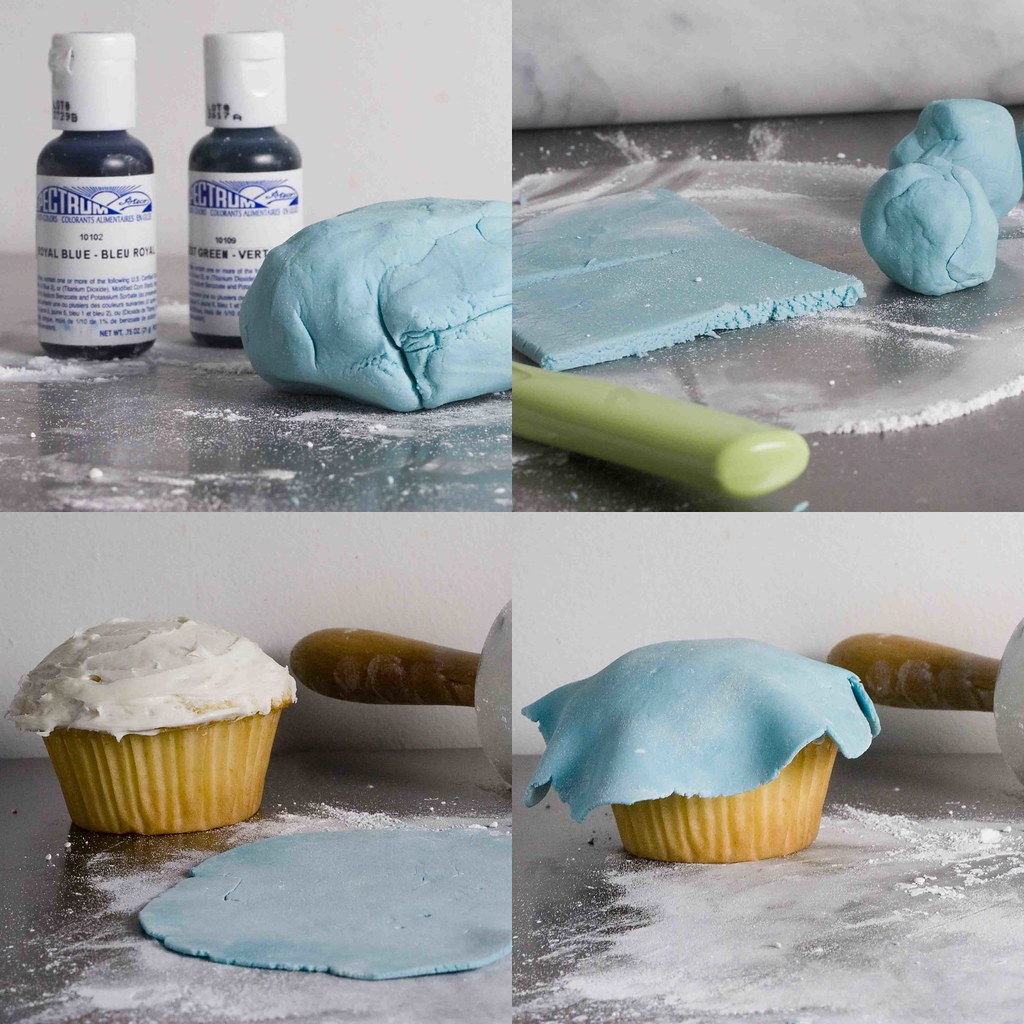

To color fondant: I find it easiest to color it after making it, as there's often several colors you want one batch to be.  Also, over time colors can change/darken so coloring when needed is best.  Add a couple of drops of good gel food coloring to the dough at a time, kneading and assessing the color.  Note: I suggest wearing food-grade gloves while doing this, as good food colors can stain your hands.  If you don't use them, scrubbing hands with exfoliating products should remove dye color with a little patience.

To make light blue green: use a 2-1 ratio of blue to green food color
To make orange: 2-1 ratio of red to yellow food color
To make green: 4-1 ratio of green to brown food color(this makes a more olive green - you can just use green color, too)

To make the cupcakes (recipe adapted from King Arthur Flour basic golden vanilla)...

24 medium cupcakes


What you need...
2 cups sugar
3 1/4 cups all-purpose flour
2 1/2 teaspoons baking powder
1 teaspoon salt
1/4 cup unsalted butter (softened)
4 large eggs

To make it orange blossom-flavored
Add 1 tablespoon orange blossom water
Zest of one orange
1 teaspoon powdered ginger

To make it rosewater-flavored 
Add 1 tablespoons rosewater
1 teaspoon cloves
2 teaspoons cinnamon

(to make half and half, just divide the batter and halve the flavoring)

Preheat oven to 350 degrees Fahrenheit.  Line cupcake tins with paper.

In a large mixing bowl, whisk together sugar, flour, baking powder and salt.

Add buter and beat with hand or stand mixer on low until it resembles sand.

Combine milk and desired flower flavorings.  Beat on low for 30 seconds then on medium for 30 seconds, scraping the sides.

With mixer still on low, add eggs, one at a time.  Scrape bowl again and beat another 30 seconds on medium high.

Transfer batter to cupcake tins - a little more than 1/4 cupfuls each (you want them to have big tops).  To just a little under the cupcake tin rims

Bake for 23 - 25 minutes or until a toothpick comes out clean.

Remove and allow to cool before removing from pans.

To decorate your cupcakes you'll need...

Buttercream frosting to coat cupcake tops before fondant, and to secure flowers (I use premade with a little honey beat in for better flavor)
Light blue fondant for tops
White fondant to make orange blossoms
Golden dragees for the orange blossom centers
Edible markers (optional) to add detail to leaves and roses
Various colored fondants for roses

Tips for making blue tops...

Divide your dough into the number of cupcakes you have, and roll those sections into balls to easily make rounds

Coat the tops with a small amount of buttercream to act as glue, and to fill in or balance out the top (add more to one side if it's lopsided)

After adding the rolled fondant top, trim the edges of the round so that it just wraps under the lip of the cupcake top - tuck under and smooth as you go

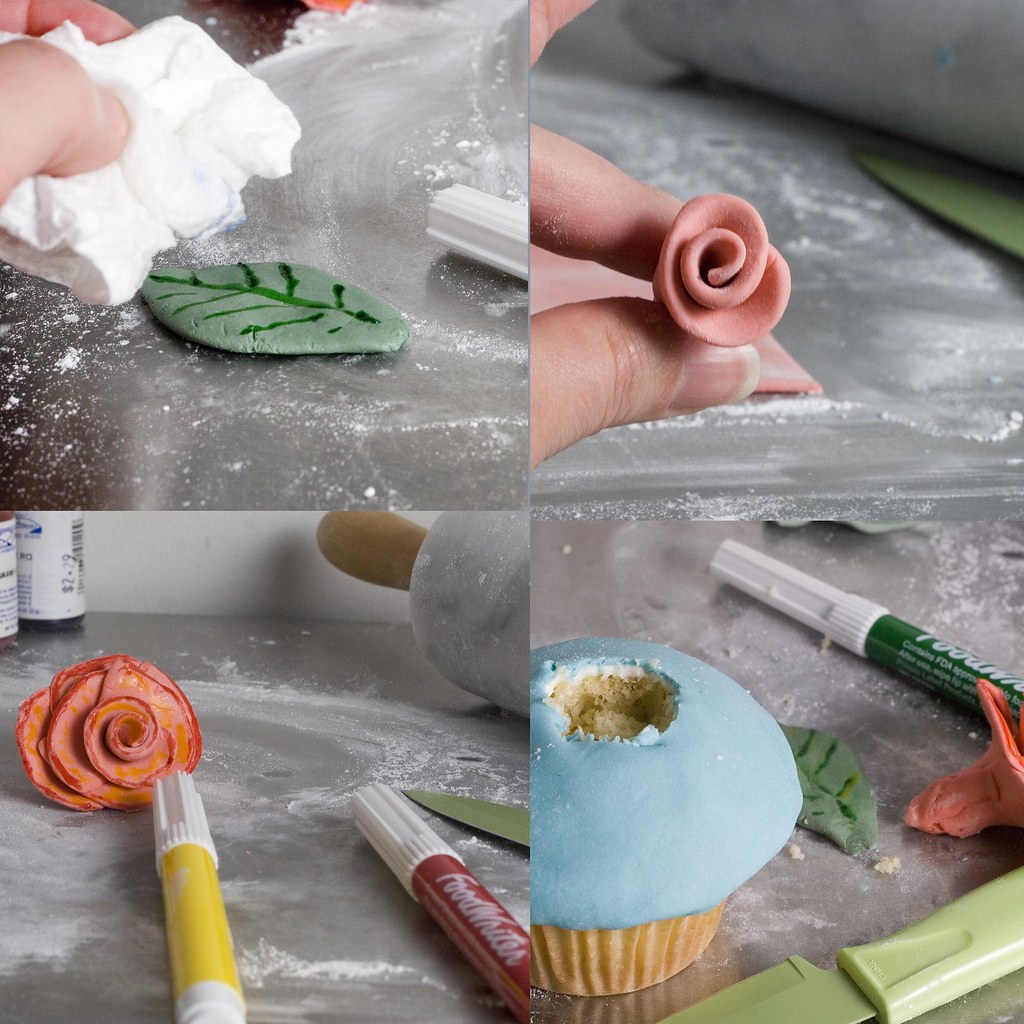
Cut a conical hole in the center to attach roses - add a small amount of buttercream to the "stem", then fit it into the hole

Secure all leaves and flowers with a tiny amount of buttercream and a toothpick or knife


Tips for making roses...


Start with a small strip and roll a rosebud, then hand form individual petals to attach at the "stem"

Round and smooth the edges as you go

Use a little yellow and red food safe marker to add detail to roses - then blot with damp paper towel to blend

Tips for making the orange blossoms...
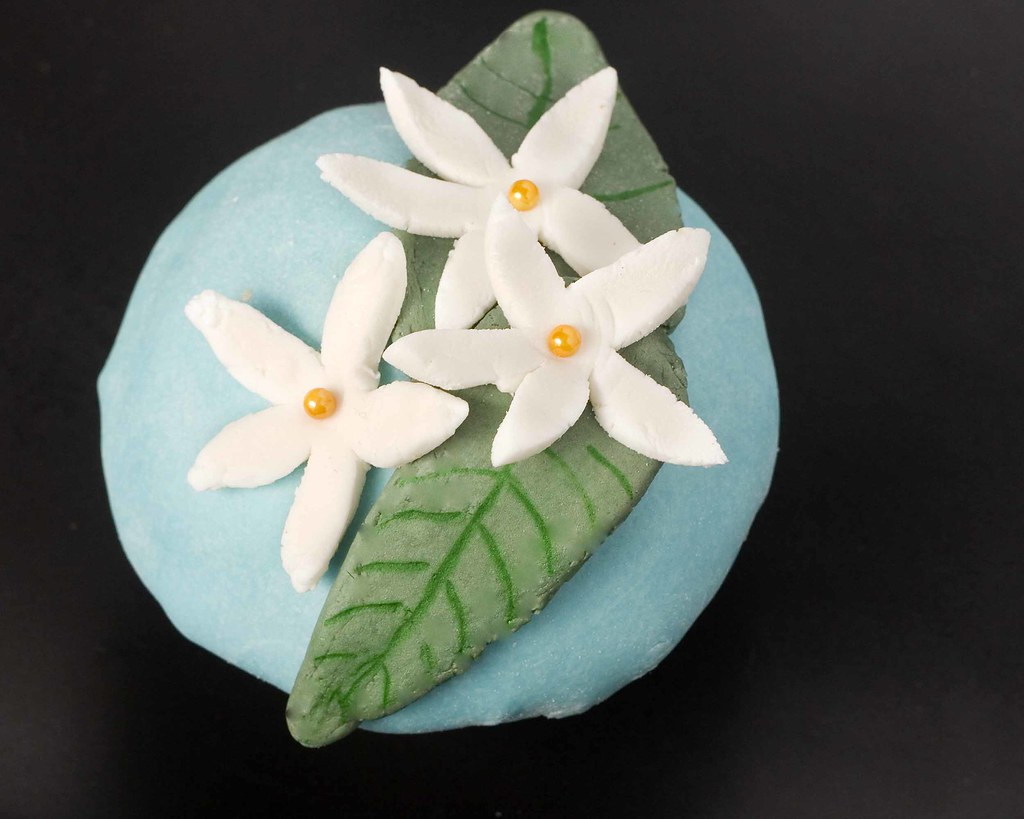

Find a picuture of blossoms to work off of, and roll out your white fondant and cut free-hand to size

Alternately, use a mini cookie cutter that is star or starfish-shaped like this one

Attach dragees to centers with a tiny amount of buttercream on a toothpick

Tips for making leaves

Roll out green fondant and find pictures of leaves you'd like to make, or use various cutters

Use green edible marker to make leaf veins - blot with damp paper towel to blend

Sunday, January 31, 2010

Cook your hobby: Scrabble cookies!


Recently there was  a cooking challenge over at the Chickenless Kitchen: Cook your hobby!  By that, she she meant that everyone should in some way cook something that represented in some way one of their other non-cooking hobbies.  I thought it was a great idea, and immediately thought of several options: cooking (wait, no, that didn't count)... reading!  Yes, that works!  Ah, but what then?  Make a bunch of book cupcakes?  Nope.  I needed something more interesting... How about mice racing?  Hmm... would be great if I actually did something like that, but since I just made it up I'm pretty sure I'd get called out pretty quickly.  Yeah, I could say photography, painting, travel and all the other hobbies easily found on survey checklists... but that's no fun, right... ? 


You know what IS fun?  Scrabble!  I decided to do Scrabble Cookies because I really do love Scrabble and Jason and I often talk friends into playing horrible mutant versions of the game for our amusement.  It's always good times.  Also, the idea of making rectangular cookies with letters on them seemed simple enough...

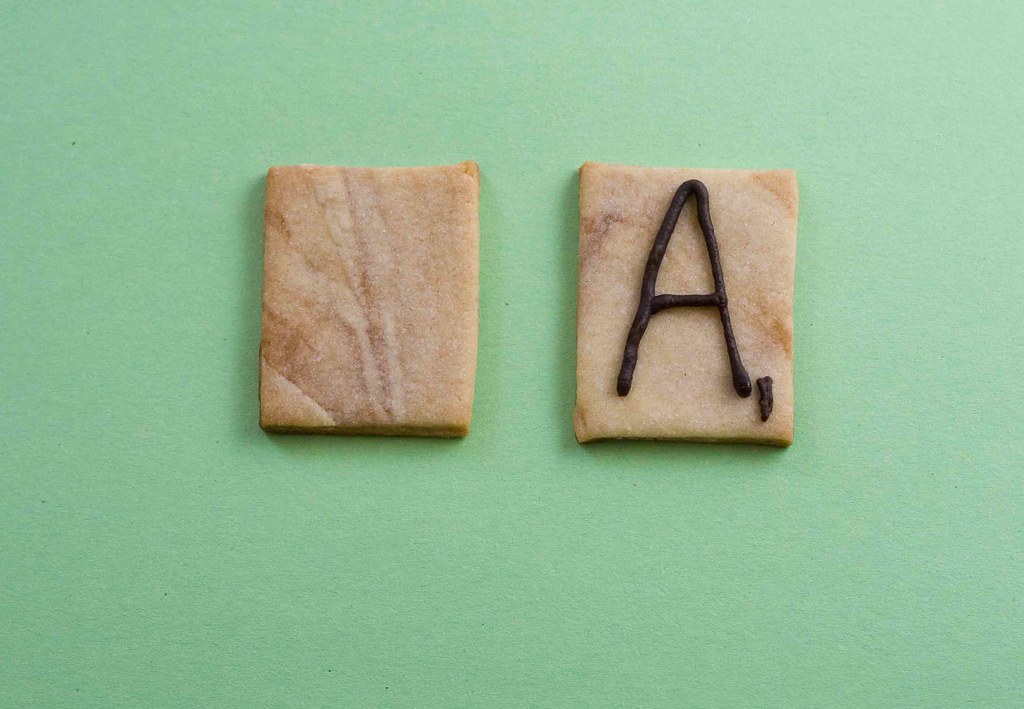
So I went to consult my trusty Joy of Cooking and found a nice recipe for a fourteen-in-one master cut out cookie recipe and adapted it to make: Wood Grain Orange Chocolate Cookies!  The wood grain was important to me as real scrabble tiles are wood and I've always loved that about them.  After finding a good way to achieve that, it's simply a matter of either piping on chocolate ganache for letters or using an edible marker (I tried the latter version on my "actual size" cookies since they were a bit small to manuever a piping bag around).  On a side note: I had tried another method for the letters involving mini alphabet cookie cutters that I sent away for specially, but it was a total, hilarious disaster.  I wish I'd taken a picture of the sad, slumpy & disfigured letters it produced.  Ah well, in the end it turned out good!

If you enjoy these cookies half as much as I enjoy Scrabble, my work here is done...


Recipe: Scrabble Cookies


For the Wood Grain Chocolate Orange Cookies (adapted from Joy of Cooking's Marble Cookies)...
2 1/2 cups AP flour
1/2 pound unsalted butter cut into 14 pieces, at room temperature (that's 2 sticks)
1 cup superfine sugar (you can also pulse granulated sugar in a food processor for 1 minute)
1/2 teaspoon table salt
1 large egg yolk
1 large egg
2 teaspoons vanilla
4 ounces melted semisweet baking chocolate
The zest of 1 orange

For the Letters...
For larger (2 inch high) cookies: 1 cup chocolate ganache, cooled slightly and added to a piping bag with a number 3 round pastry tip (you'll need a bar of semisweet baking chocolate and a pint of heavy cream for this - see "ganache" link for method)
OR
For "actual size" (2.5 cm high) cookies: Edible black marker

What to do with it all...
  1. On medium speed, mix butter, sugar and salt unti fluffy
  2. Add egg yolk, whole egg, zest and vanilla and mix until well blended
  3. Reduce speed to low and add flour slowly until well combined
  4. Divide dough half, wrap and refigerate unti firm - at least 1 hour and up to 2 days
  5. Preheat oven to 375 degree F and prepare 2 cookie sheets with parchment paper or Silpat
  6. On a well-floured surface, roll out your first round to a 14 inch thick then drizzle over half your melted chocolate
  7. Knead the dough loosely to incorporate the chocolate just so you see streaks in the dough
  8. Re-flour your surface and roll dough out to 1/8 inch thick
  9. Cut cookies to desired size using a ruler and a sharp knife: 2 inches by 1 1/4 inches for large cookies, 2.5 cm by 2 cm for "actual size" cookies"
  10. Repeat process with second dough half
  11. Place cookies on baking sheets, and place sheets into oven (one on lower rack, one on upper)
  12. Bake for 5 - 7 minutes, rotating sheets half way thru baking (watch closely for browning)
  13. Cook and decorate either with melted ganache, or edible marker (recommended for smaller cookies)
Makes approx 2 dozen large Scrabble cookies, or a whole boards' worth of the "actual size"!


On another note, I'd like to thank Nancy of wonderful Spicie Foodie and Kathy of the brilliant Colors of Indian Cooking for the Honest Scrap Award!  In accepting this award, I am supposed to list 10 honest things about myself, so here goes!

1.  My kitchen is a whopping 100 square feet (about 7 x 14), galley style, with practically no workable surface areas.  I sometimes pretend I am MacGuyver to invent ways to cook (I know lots of people have much smaller kitchens and I should not complain!)
2.  I've never met a piece of chocolate I didn't like
3.  I will choose a pickle over a cupcake on any day of the week
4.  I didn't not learn to swim until I was 20 due to a fear of water
5.  I secretly believe myself to be a queen of the thrift stores (with pride) for my ability to find amazing things in them
6.  As a child I was so sensitive to sugar that I once ran off and dislocated my own shoulder in a hyperactive flurry after inhaling a pudding cup that a friend of my parents' unwittingly gave me
7.  I have a dream to someday own goats
8.  My big toes point upwards a bit and give off the appearance of being snobbish
9.  Everyone in Chicago seems to love living by the lake, which I did once, and hated it passionately come Winter
10.  Though I am a born and bred Chicago girl, I prefer New York style pizza to Chicago deep dish... which is, of course, sacrilege...

Thanks again everyone!

Saturday, January 23, 2010

Pursuits in baking - Easy Blueberry Lemon Bundt


So, I've decided to start baking more.  I've hesitant to bake much for years, limiting myself to just flipping thru baking and decorating books and vicariously making alterations and imagining the perfect, awe-inspring results.  The reality, I felt, would be much different.  Exploding muffin tins, caved cheesecakes and gravity-oppressed souffles haunt my dreams.


I'm not exactly sure why I have this primal fear of desserts.  Perhaps starting up now will reveal a repressed memory of a bananas foster gone wrong setting my pigtails a-flame as a child?  Or maybe in another life I was flattened by a rogue 50 lbs bag of flour that leapt from a high shelf at the General Store?  More likely it's a simple fear of failure... and the mess this will turn my kitchen into on a regular basis.

All of that being said, I'm excited to branch out into the baking world... and to be sharing it with all of you.  Hopefully they're be lots of fun to be had, and probably a disaster or two to laugh about.  I mean, seriously, look what I do when I just taking PICTURES of baked things.

I thought I'd start out with some baby steps here and explore a couple of recipes that almost require a cake mix.  I say "require" because I've learned the hard way that adding things willy-nilly to pre-set cake recipes can get you into lots of trouble.  Boxed cake mixes, besides being fool-proof, contain emulsifiers that allow you throw in additions without making much, if any, changes to the mix recipe.


So here is my first project.  Be sure to check out the wonderful Carol Egbert's site for another project I guest posted on rainbow cupcakes using all-natural color - it should be up soon!


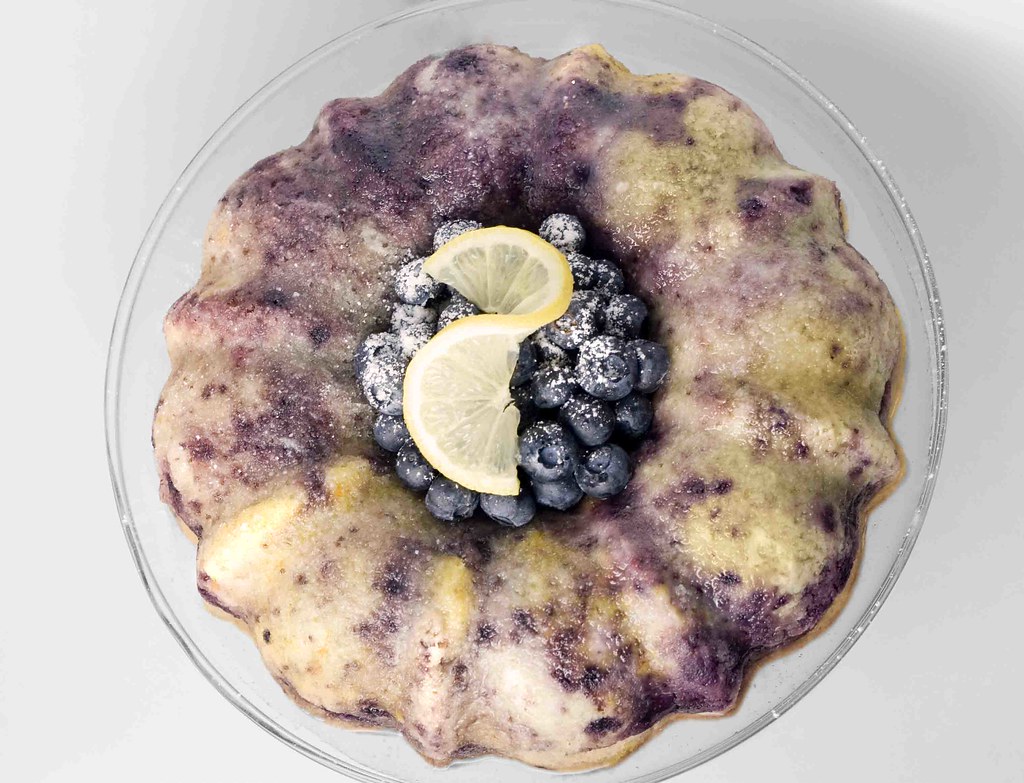
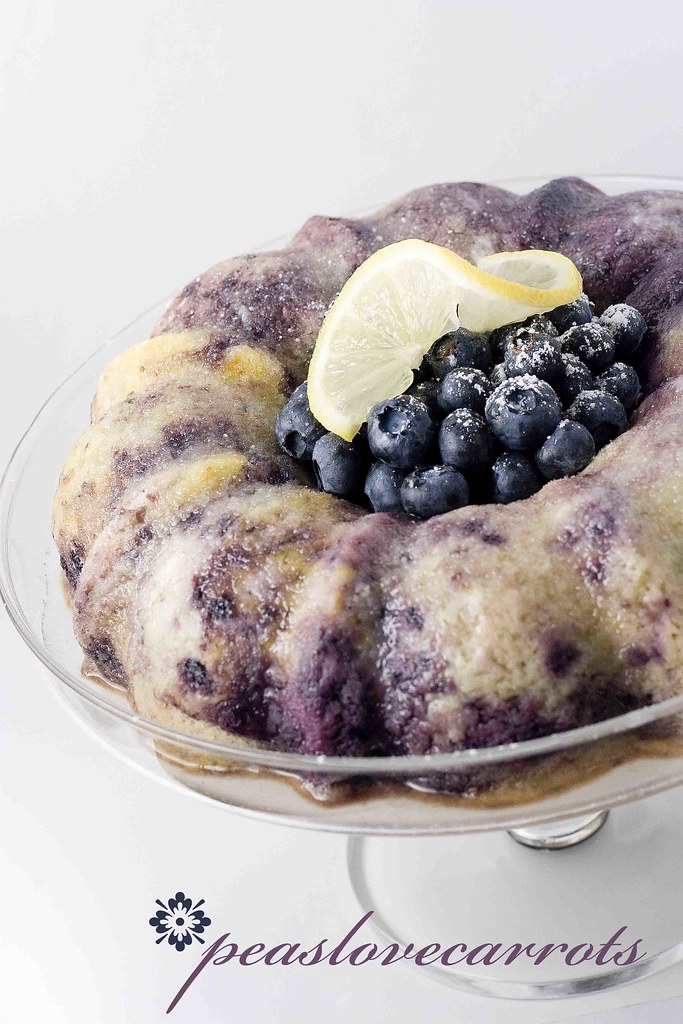
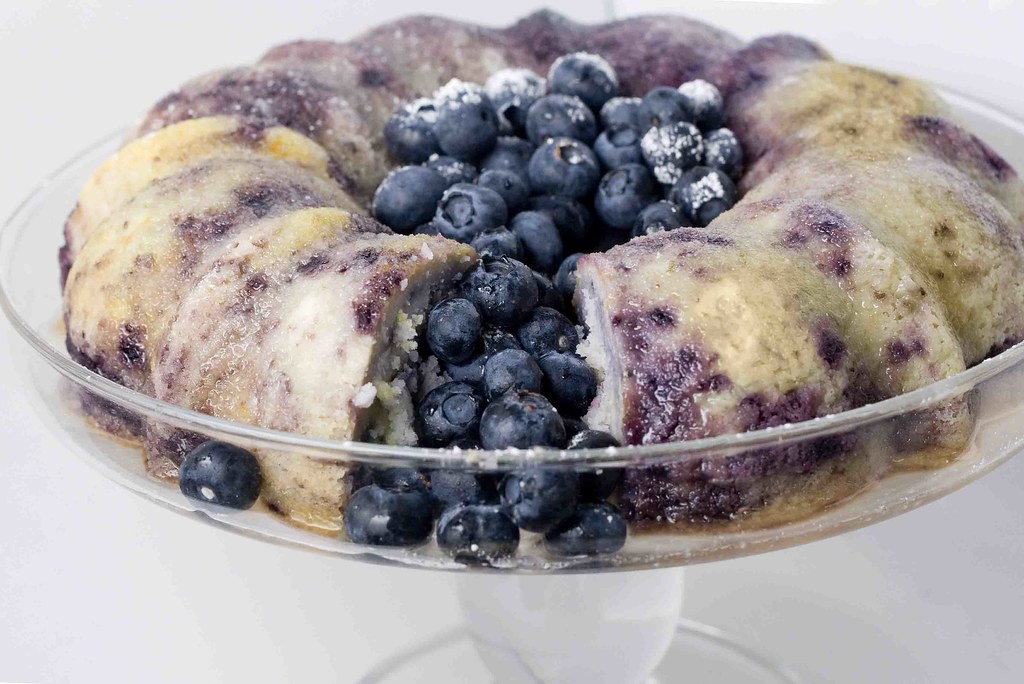
Recipe: Blueberry Lemon Burst Bundt Cake

What you'll need...
One box vanilla or white cake mix (you can also use lemon if you really want lemony cake!)
PLUS
Whatever ingredients the cake mix calls for
1 cup of plain yogurt (you can also use blueberry yogurt to really up the blueberry flavor!)
1 cup frozen or fresh blueberries
1/2 cup water
The zest and juice of one lemon
1 teaspoon of turmeric (optional, for bright yellow color - don't worry, your cake won't taste like turmeric!)

Special equipment: 12 cup bundt pan, small sauce pan, hand blender or food processor

What to do with it all...

Preheat oven to temperature according to boxed mix for a bundt pan
Liberally grease your bundt pan 
Add blueberries and water to a small saucepan to simmer for 5 mins, or until thawed (if using frozen) then allow to cool
Mix all cake mix ingredients according to directions, folding in the cup of yogurt, lemon juice and zest and optional turmeric
Puree your blueberries using a hand blender or food processor/stand blender
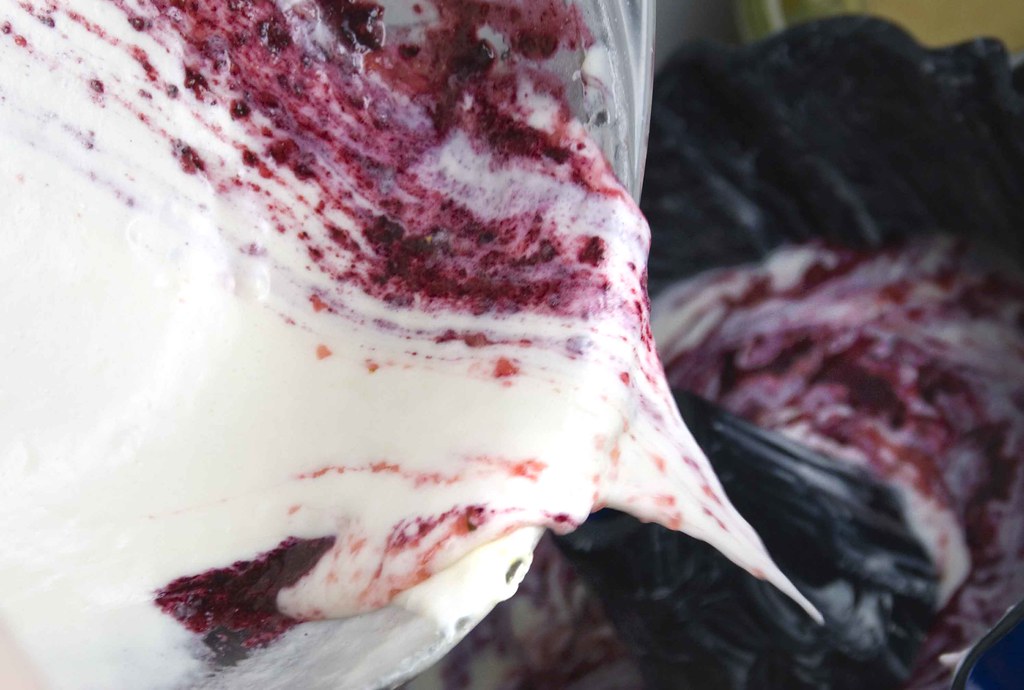
Pour puree into your cake batter, but do not stir
Pour batter into your bundt pan and bake according to box instructions (your cake may take a little longer because of the additions)
Remove after baking and allow to cool before inverting and removing
Glaze with a simple syrup, honey or simply dust with powdered sugar!

LinkWithin

Related Posts with Thumbnails