I'd like to say it seems to be the season for food blog contests right now, but I think it's more of a matter of contests that have piqued my interest enough to go thru all the effort I inflict on myself in making my entries. The creative pondering, flustered experimenting and the occasional mini-inferno I run into while submitting posts means it's gotta be good for me to do it. When I saw Sanjana's contest over at KO Rasoi, I knew it was time to pull out the fire extinguisher again and get baking.
Sanjana's contest asked that you create a dish inspired by a super adorable charm bracelet...
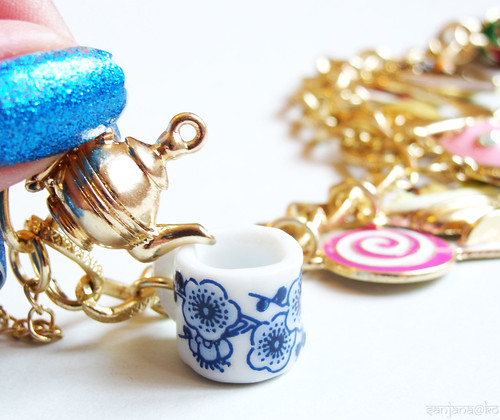
The bracelet is almost as adorable as the cool blue sparkly nail polish you can see she's wearing in the picture... see it now? Other than the polish, the thing that caught my eye was the little white and blue delft style china cup charm. Seeing as it's a roughly "tea" themed bracelet (though I don't remember the last time I had a margarita at tea, sadly), I decided I'd make something I've always wanted to make - petit fours.
What I didn't realize is that "petit four" is actually a French phrase meaning "insanely difficult" or "frustrating to the point of drinking a 3 glasses of wine rapidly, on an empty stomach because these 'petit fours' refuse to provide you with something suitable to feed yourself with." Or something roughly like that.
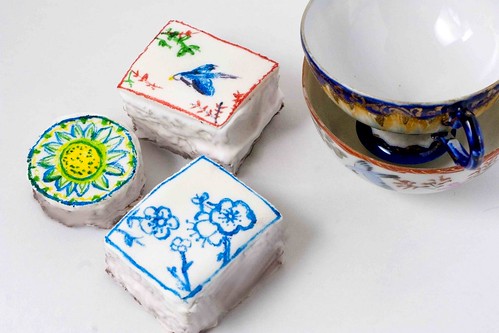
You see, I wanted these to be not just any petit fours. Oh, no, that's just too dull (wise) for me. I wanted to make the sort of cakes that you could write on with edible marker to create patterns - in this case patterns that match your tea service. This meant coating them with something that dried hard enough to accomplish this. Typical petit four icing is a little too fragile for this, I figured. I first tried rolling on some of my trusty recipe for marshmallow fondant, but I didn't like the way it draped. Next my mind turned to royal icing. Royal icing was something I vaguely remembered using on sugar cookies my mother made when I was little, but I always remembered liking them better without it. Despite that and the fact most recipes I read included warnings like "Use immediately or it will harden indefinitely" and "Good as a glue, but not pleasant to flavor with" I was not to be deterred.
An hour later I had coated a beautiful set of little chocolate cakes in a gloppy, uneven mess of what amounted to Elmer's glue... and it tasted about the same. I honestly don't know if it was my recipes (I tried 2), the cook or a combination that did me in, but in the end I tossed the whole collection of useless lumps into the trash. Enter wine.
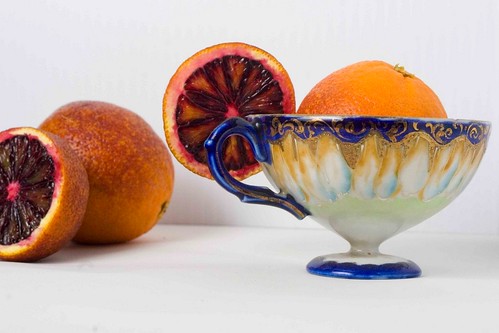
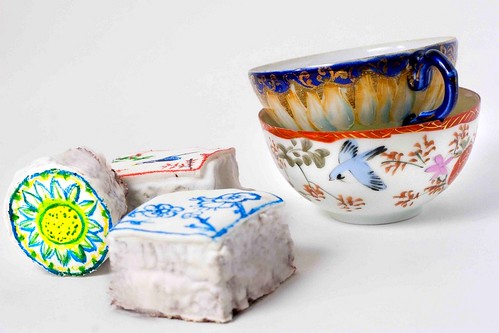
The next day I did some more research and turns out it's not a great idea to coat entire cakes with royal icing. I also realized I needed a denser cake - like a génoise or sponge. Who knew? Lots of people do, as my reading was leading me to understand. Obviously I'm still new at this cake thing. In the end the tea cakes shown in the pictures have a combination of petit four icing with a top piece of fondant. Which works, but I think it's a bit too labor-intensive for such little cakes, don't you? In fact, when Jason saw these and then looked at the sample I kept of the strictly fondant version, he said he liked the fondant version better. It was my drive for perfectly smooth shapes that made me wish for the perfect icing. The more I thought about it, the more I realized the fondant ones didn't look too shabby, I liked their little pillow-y edges... and they certainly were less conducive to reducing me to near tears. Less tears = win in my book any day.
How to Make: Blood Orange and Chocolate Petit Fours
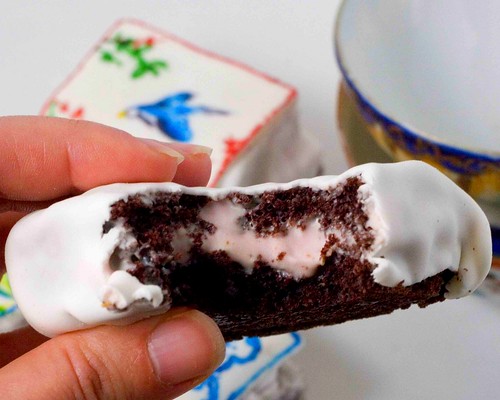
Since I take the cake recipe directly from the Joy of Baking site, I'm not going to reproduce it here. It's adapted from the Cake Queen: Rose Levy , so you know it's good. The link can be found below...
Recipe for Chocolate Sponge Cake on Joy of Baking
Once you've made your cake and allowed it to cool, cut it into desired shapes using cutters or a serrated knife. You'll want and even number of every shape since you'll fill w/frosting and stacking in doubles...
To make the Blood Orange Frosting...
2 cups confectioners sugar
1/2 cup unsalted butter (softened)
1/2 teaspoon vanilla extract
Juice and zest of 1 large blood orange
Orange food coloring (if desired)
With a hand or electric mixer, cream the butter until smooth. Add vanilla and the zest and blend. Gradually beat in sugar. Add the blood orange juice and whip on high until fluffy. You may add a drop of orange food coloring if you like.
For the icing...
Approx 1 cup by volume of marshmallow fondant
Various edible marker colors
To put it all together...
Roll out your fondant to an 1/8 inch thickness and cut into shapes that allow you to cover your stacked cake shapes.
Spread a layer of blood orange frosting between two layers of sponge cake. Frost the outside with a thin crumb coating of frosting to allow the fondant to adhere evenly.
Drape your cakes with fondant pieces and smooth tops
Using your food-coloring pens, draw patterns based on your tea cups on the tops of your cakes. Done!
Showing posts with label chocolate ganache. Show all posts
Friday, March 26, 2010
Sunday, January 31, 2010
Cook your hobby: Scrabble cookies!
Recently there was a cooking challenge over at the Chickenless Kitchen: Cook your hobby! By that, she she meant that everyone should in some way cook something that represented in some way one of their other non-cooking hobbies. I thought it was a great idea, and immediately thought of several options: cooking (wait, no, that didn't count)... reading! Yes, that works! Ah, but what then? Make a bunch of book cupcakes? Nope. I needed something more interesting... How about mice racing? Hmm... would be great if I actually did something like that, but since I just made it up I'm pretty sure I'd get called out pretty quickly. Yeah, I could say photography, painting, travel and all the other hobbies easily found on survey checklists... but that's no fun, right... ?
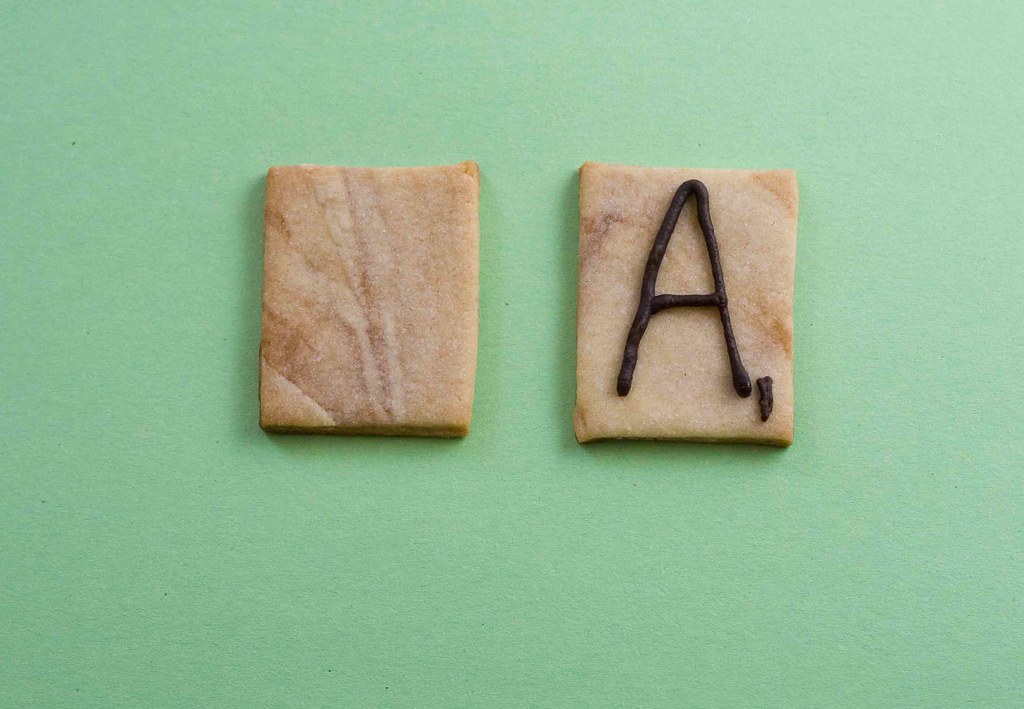
You know what IS fun? Scrabble! I decided to do Scrabble Cookies because I really do love Scrabble and Jason and I often talk friends into playing horrible mutant versions of the game for our amusement. It's always good times. Also, the idea of making rectangular cookies with letters on them seemed simple enough...
So I went to consult my trusty Joy of Cooking and found a nice recipe for a fourteen-in-one master cut out cookie recipe and adapted it to make: Wood Grain Orange Chocolate Cookies! The wood grain was important to me as real scrabble tiles are wood and I've always loved that about them. After finding a good way to achieve that, it's simply a matter of either piping on chocolate ganache for letters or using an edible marker (I tried the latter version on my "actual size" cookies since they were a bit small to manuever a piping bag around). On a side note: I had tried another method for the letters involving mini alphabet cookie cutters that I sent away for specially, but it was a total, hilarious disaster. I wish I'd taken a picture of the sad, slumpy & disfigured letters it produced. Ah well, in the end it turned out good!
If you enjoy these cookies half as much as I enjoy Scrabble, my work here is done...
Recipe: Scrabble Cookies
For the Wood Grain Chocolate Orange Cookies (adapted from Joy of Cooking's Marble Cookies)...
2 1/2 cups AP flour
1/2 pound unsalted butter cut into 14 pieces, at room temperature (that's 2 sticks)
1 cup superfine sugar (you can also pulse granulated sugar in a food processor for 1 minute)
1/2 teaspoon table salt
1 large egg yolk
1 large egg
2 teaspoons vanilla
4 ounces melted semisweet baking chocolate
The zest of 1 orange
For the Letters...
For larger (2 inch high) cookies: 1 cup chocolate ganache, cooled slightly and added to a piping bag with a number 3 round pastry tip (you'll need a bar of semisweet baking chocolate and a pint of heavy cream for this - see "ganache" link for method)
OR
For "actual size" (2.5 cm high) cookies: Edible black marker
What to do with it all...
- On medium speed, mix butter, sugar and salt unti fluffy
- Add egg yolk, whole egg, zest and vanilla and mix until well blended
- Reduce speed to low and add flour slowly until well combined
- Divide dough half, wrap and refigerate unti firm - at least 1 hour and up to 2 days
- Preheat oven to 375 degree F and prepare 2 cookie sheets with parchment paper or Silpat
- On a well-floured surface, roll out your first round to a 14 inch thick then drizzle over half your melted chocolate
- Knead the dough loosely to incorporate the chocolate just so you see streaks in the dough
- Re-flour your surface and roll dough out to 1/8 inch thick
- Cut cookies to desired size using a ruler and a sharp knife: 2 inches by 1 1/4 inches for large cookies, 2.5 cm by 2 cm for "actual size" cookies"
- Repeat process with second dough half
- Place cookies on baking sheets, and place sheets into oven (one on lower rack, one on upper)
- Bake for 5 - 7 minutes, rotating sheets half way thru baking (watch closely for browning)
- Cook and decorate either with melted ganache, or edible marker (recommended for smaller cookies)
On another note, I'd like to thank Nancy of wonderful Spicie Foodie and Kathy of the brilliant Colors of Indian Cooking for the Honest Scrap Award! In accepting this award, I am supposed to list 10 honest things about myself, so here goes!
1. My kitchen is a whopping 100 square feet (about 7 x 14), galley style, with practically no workable surface areas. I sometimes pretend I am MacGuyver to invent ways to cook (I know lots of people have much smaller kitchens and I should not complain!)
2. I've never met a piece of chocolate I didn't like
3. I will choose a pickle over a cupcake on any day of the week
4. I didn't not learn to swim until I was 20 due to a fear of water
5. I secretly believe myself to be a queen of the thrift stores (with pride) for my ability to find amazing things in them
6. As a child I was so sensitive to sugar that I once ran off and dislocated my own shoulder in a hyperactive flurry after inhaling a pudding cup that a friend of my parents' unwittingly gave me
7. I have a dream to someday own goats
8. My big toes point upwards a bit and give off the appearance of being snobbish
9. Everyone in Chicago seems to love living by the lake, which I did once, and hated it passionately come Winter
10. Though I am a born and bred Chicago girl, I prefer New York style pizza to Chicago deep dish... which is, of course, sacrilege...
Thanks again everyone!
Labels:
baking,
chocolate ganache,
cookies,
cute,
different,
hobbies,
joy of cooking,
marble cookies,
orange,
scrabble
Subscribe to:
Posts (Atom)